
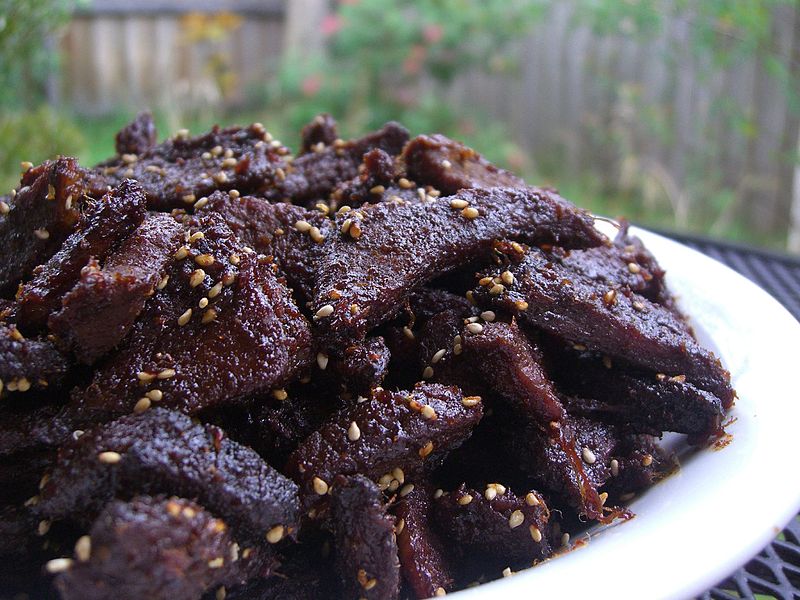
Jerking Your Meat in the Woods
Tired of eating meat snacks and products that are high in salt, fat, nitrites and preservatives? Craving something healthier and more sustainable? Why not try a home made jerky? With relatively little preparation and processing you can make a batch to last months. It is a high in protein snack that provides some interesting nutrition.
Alternatives - Buffallo, Kangaroo, Pork (this requires slightly different preparation), Turkey
What you will need:
1) Good quality beef! We would always suggest using organic, grass fed beef where possible, as it produces the tastiest, healthiest jerky. Unlike choosing a good piece of steak meat, jerky requires the leanest meat possible. The normally desirable fat "marbling" which makes steak extra tasty, will make your jerky spoil quickly. The leaner the meat the better.
2) Salt, herbs and spices. There are many ways to make jerky and it can be flavoured in many different ways. Some more traditional recipes include coriander seeds, salt and pepper.
Other popular jerky flavourings include : oriental style, chilli, Worcestershire sauce, garlic, wood smoke, e.t.c.. You can use pretty much what you want to flavour the meat.
With regards to salt, we would recommend using a tablespoon full per kilogram of meat. The salt helps dry out and preserve the meat and should definitely not be omitted from the recipe.
3) Prepare your meat of choice by carefully cutting it into strips or chunks. The smaller the pieces, the faster the meat will cure. Try and keep the meat pieces/slices at a uniform size, that way they will cure and dry out at the same rate, guaranteeing consistency. Remove all visible fat if possible as fat is what will make your jerky spoil quickly.
4) Place the meat slices/chunks into a bowl and add the salt and spice mix of your preference. Some people like to add a couple of teaspoons of sugar (it helps with flavour and preservation). Mix thoroughly and cover the bowl with kitchen foil. Leave to marinate for at least eight hours or preferably overnight.
5) Pour away any excess liquid from the bowl and place the marinated meat on drying racks, to be placed in the oven (oven door slightly open, gas mark 1), in a smoker house or into a dehydrator (at 60oC). The length of time needed will vary, depending on the size and moisture content of the meat. You can expect curing times to be anywhere between 4-12 hours.
6) The jerky is ready when it is dry to the touch but will still bend without cracking. If your jerky cracks when you bend it, it has been cured for too long and too much moisture has been removed, hence why it is brittle. It will still be fine to eat just a little strange texture wise.
7) Stored in an airtight container, jerky can have a good shelf life. This can be between 1 and 18 months depending on how it is made and how it stored. Vacuum sealing is recommended to maximise shelf life. Adding oxygen absorbing pads into an air tight container alongside the meat will hugely increase shelf life. Refrigeration will also help extend shelf life however freezing is not recommended. The jerky should be kept in a cool and dry place.
Ultimately, when making your own jerky, you can control exactly what goes into it, you will always know just how fresh it is, you can find information on where the meat was sourced. Furthermore, if done right, home made jerky can be a lot cheaper than processed and store bought jerky.
Try making smaller batches first, to establish which flavours and techniques work best for you.
Good luck!
Photo:Alpha from Melbourne, Australia, CC BY-SA 2.0 <https://creativecommons.org/licenses/by-sa/2.0>, via Wikimedia Commons
